Category: Product Reviews

  • Flexible LED Ceiling Lights Review: Easy Installation Without Clips

    Flexible LED Ceiling Lights Review: Easy Installation Without Clips

    This post contains affiliate links. If you purchase through one of my links, I may earn a commission at no extra cost to you. We bought and installed these lights ourselves, and all opinions are my own.

    We recently installed the AILBTON 18m smart LED lights along the ceiling, and they turned out to be much easier to work with than I expected.

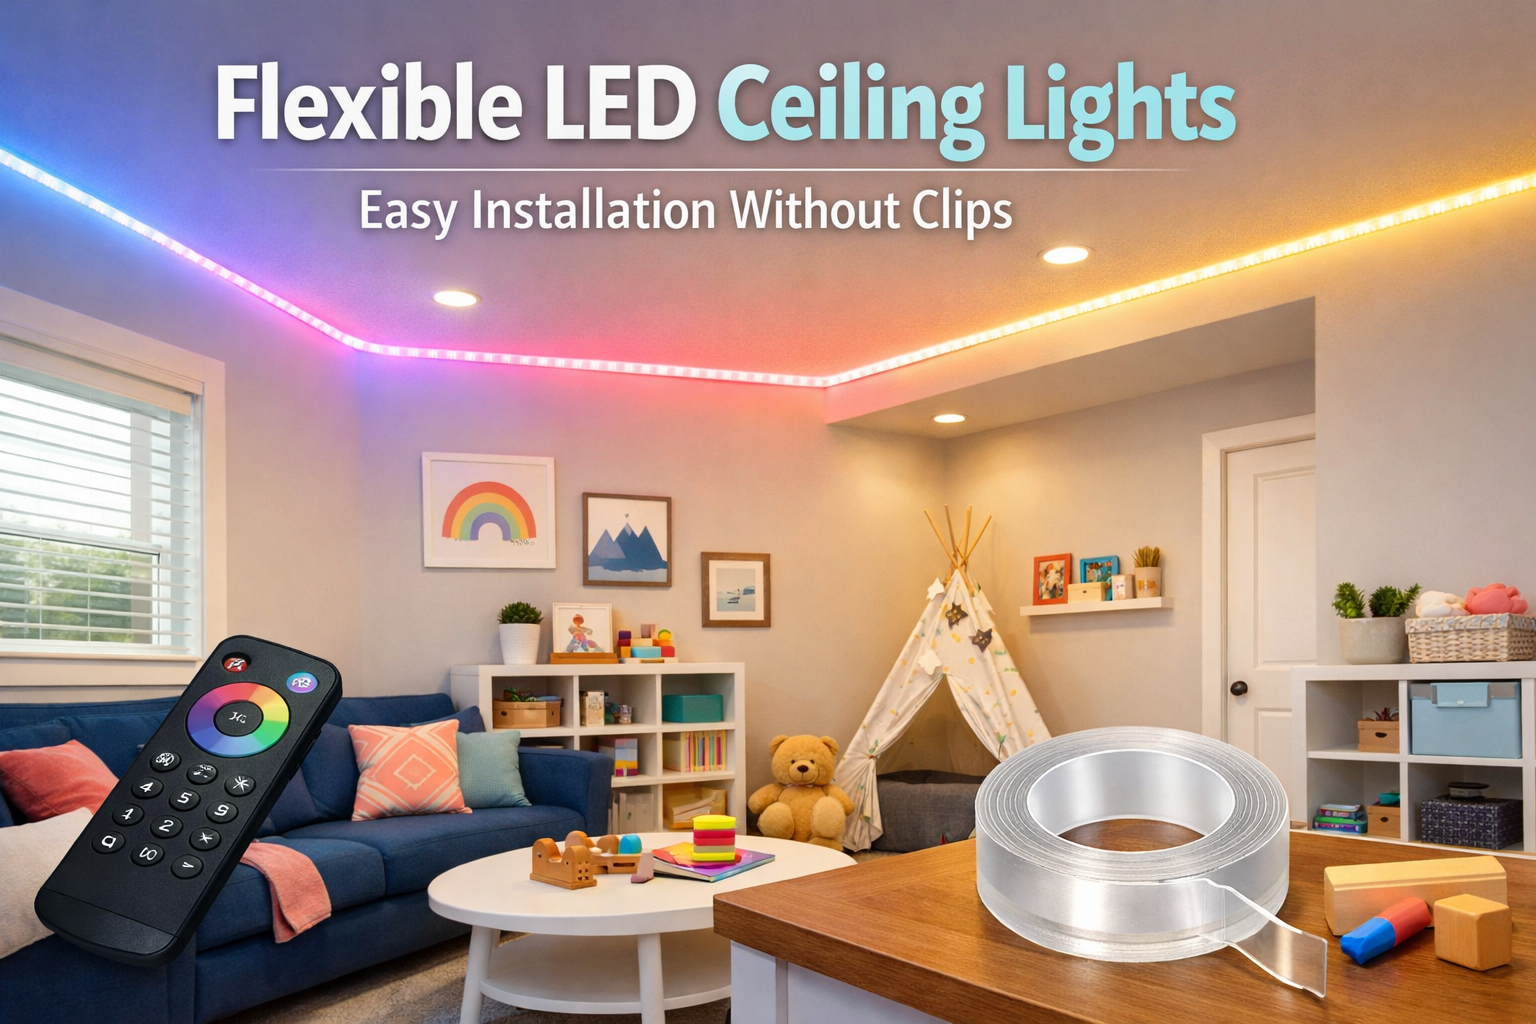
    The biggest surprise was that I did not need to use the installation clips that came with them. Instead, I used nano tape to secure the lights along the ceiling. The strip was flexible enough to bend cleanly around corners, and the whole setup was simple: plug it in, use the remote, and choose a color.

    See the AILBTON 18m smart LED lights on Amazon

    Why We Chose These Lights

    I wanted lighting that could run along the ceiling without making the room feel cluttered. I also wanted something flexible enough to handle corners without a complicated installation.

    These lights worked well for that because the strip is very bendable. I was able to guide it around the room and make the turns without fighting stiff sections or needing a lot of extra hardware.

    Installation Without the Included Clips

    The lights came with clips, but I ended up skipping them.

    I used nano tape instead, which let me mount the strip directly along the ceiling. That gave the installation a cleaner look and saved me from placing a clip every few inches.

    The nano tape held the strip in place while still letting me adjust sections as I worked around the room. For our setup, it was the easier option.

    The most important thing is to start with a clean, dry surface. Dust along the ceiling line can keep any adhesive from holding well. I wiped the area first, then worked in short sections rather than trying to install the entire length at once.

    How Well Did It Handle Corners?

    Very well.

    The strip is flexible and handled corners without becoming bulky or awkward. I could guide it around each turn without needing special corner connectors.

    That was one of the biggest reasons the installation went smoothly. A stiff light strip would have been much harder to keep neat along the ceiling.

    Plug-and-Play Setup

    Once the lights were installed, setup was simple.

    I plugged them in and used the included remote. There was no complicated process required before we could start using them.

    The remote makes it easy to change colors and try different combinations without getting up or using a phone every time.

    Color Options

    There are lots of color combinations, which makes the lights more useful than a single-color accent strip.

    You can change the feel of the room depending on what you are doing. Brighter colors can make the space feel fun and energetic, while softer colors work better when you want a calmer atmosphere.

    That flexibility makes them a good fit for a playroom, schoolroom, game room, bedroom, or any family space where you want the lighting to change with the activity.

    What I Like Most

    • Very flexible and easy to bend around corners
    • Worked well with nano tape instead of the included clips
    • Simple plug-and-play setup
    • Remote control included
    • Lots of color combinations
    • Creates a clean ceiling-line effect

    What to Know Before Installing

    Measure the full route before you start, including corners and any sections where the cord needs to reach an outlet.

    Plan where you want the power connection to end up. It is much easier to start in the right place than to discover at the end that the plug is on the wrong side of the room.

    If you use nano tape, work slowly in small sections. Press each section firmly before moving to the next one. This gives you a better chance of keeping the line straight.

    Also check the surface first. Textured ceilings or dusty paint may need more preparation than a smooth painted wall.

    Are These Lights Worth It?

    For our room, yes.

    They were easy to install, flexible enough to handle corners, and simple to use once plugged in. The range of colors gives us plenty of options, and using nano tape helped create the clean look I wanted without relying on all the included clips.

    If you want flexible accent lighting that can follow a ceiling line and change the mood of a room, these are a practical option.

    Check the current price and availability on Amazon

  • Homeschool Planet Review After 6 Years: Why It Still Works for Our Family

    Homeschool Planet Review After 6 Years: Why It Still Works for Our Family

    This post contains affiliate links. If you sign up through my link, I may earn a commission at no extra cost to you. We have personally used Homeschool Planet for six years, and all opinions are my own.

    We have used Homeschool Planet for six years, and I still absolutely love it.

    I use it for both of our kids and for nearly every part of our homeschool schedule. That includes regular subjects, online classes, outside activities, enrichment, vacations, appointments, and the plans that change at the last minute because real family life rarely follows a perfect calendar.

    I tried Google Calendar, paper planners, and planners built into individual curriculums. Each handled part of the job, but none worked as well for our whole homeschool. Homeschool Planet is the one system that has kept everything together without forcing our family to become rigid just to stay organized.

    Try Homeschool Planet free for 30 days

    What Is Homeschool Planet?

    Homeschool Planet is an online planner designed for homeschool families. It combines classes, assignments, appointments, activities, records, reminders, grades, attendance, and family scheduling in one place.

    You can use it for one child or several. Each child can have a separate schedule, and you can view everyone together or individually. You can add recurring classes, timed activities, online lessons, outside appointments, vacations, field trips, and almost anything else that affects your school week.

    It is more than a digital calendar. You can attach links or PDFs, track completed work, record grades, manage attendance, print reports, and build transcripts. It can also connect with outside calendars, including Google Calendar.

    How We Use It for Both Kids

    We use Homeschool Planet for all of our scheduling. I put regular subjects in it, but I also include online classes, outside activities, enrichment, family plans, and vacation time.

    That matters because our homeschool does not happen in a neat little box. Some days are very structured. Other days change because an activity comes up, a child needs more time on a subject, we decide to take advantage of an opportunity, or we simply need to move things around.

    Homeschool Planet lets me see the full picture without maintaining one calendar for school, another for activities, and a third place for everything else.

    The Feature That Makes the Biggest Difference

    The automatic rescheduling is the huge feature for me.

    If we need to push a subject or assignment, I do not have to move every future lesson by hand. Homeschool Planet gives me several choices for what should happen next.

    • Move the missed or delayed assignment to the next school day
    • Move it to the next regularly scheduled day for that subject
    • Double up the missed assignment with the next planned assignment
    • Shift the following assignments so the sequence stays intact

    That flexibility is what makes it work for an active and somewhat off-the-cuff homeschool family.

    A paper planner cannot automatically move an entire subject forward. Google Calendar can move events, but it does not understand the sequence of a curriculum. Curriculum-specific planners may handle one program well, but they do not manage the rest of our homeschool life.

    Homeschool Planet handles the ripple effect. I make one decision, and it adjusts the plan instead of creating more work for me.

    Daily Digests Keep Us on Track

    We use the daily email digests, and they are one of those features that becomes more useful the longer you use the planner.

    The day’s assignments and activities arrive in my inbox, so I can quickly see what each child needs to do. I do not have to open several curriculum websites or search through multiple calendars before we start the day.

    You can also use weekly digests, assignment reminders, and separate student access depending on how independently your children work.

    The Reporting Is Excellent

    The reporting is another major reason we have stayed with Homeschool Planet.

    It can track attendance, completed assignments, grades, class hours, activities, and other school records throughout the year. When it is time for our year-end evaluations, I am not trying to rebuild months of work from memory.

    I can pull organized reports that show what we completed and how our school year progressed. That saves time and gives me much better documentation than scattered notes, paper checklists, or records trapped inside separate curriculum systems.

    For families who need report cards, transcripts, class-hour reports, assignment lists, or attendance records, the information is already connected to the actual schedule and completed work.

    Everything Lives in One Calendar

    I can view both kids together or look at one child at a time. School subjects, appointments, outside classes, activities, enrichment, and vacations can all share the same system without becoming one long, confusing list.

    Recurring assignments also save a lot of time. Once a class or activity is set up, I do not have to enter the same thing every week. I can choose the school days, subject days, start and end dates, grading options, and whether the activity is timed or untimed.

    What I Tried Before Homeschool Planet

    Before settling on Homeschool Planet, I used:

    • Google Calendar
    • Paper planners
    • Planners included with individual curriculums

    Each option handled part of the job.

    Google Calendar was useful for appointments and reminders, but it did not manage curriculum sequences or homeschool records well. Paper planners were flexible until plans changed, then I was erasing, rewriting, and moving assignments manually. Curriculum planners worked inside their own programs but did not bring our entire homeschool schedule together.

    Homeschool Planet is the first one that handled the full picture well enough that I kept using it year after year.

    What New Users Should Know

    The first setup takes time. You need to enter your students, school calendar, classes, recurring activities, and the way you want assignments scheduled.

    It also has a lot of features. You do not need to learn all of them on the first day.

    Start with your children, core subjects, and regular weekly schedule. Add reporting, grading, student logins, detailed records, and extra features after the basic planner feels comfortable.

    The work is front-loaded. Once the year is set up, the day-to-day planning becomes much easier.

    Who Will Get the Most Value From It?

    Homeschool Planet is especially useful for families who:

    • Homeschool more than one child
    • Use a mix of curriculum, online classes, and outside activities
    • Need to move assignments when life changes
    • Want daily or weekly email digests
    • Need year-end records, attendance, grades, or class-hour reports
    • Prefer one detailed system instead of several separate planners

    A family with one child and a very simple schedule may not need every feature. Someone who strongly prefers writing everything on paper may also find it more detailed than necessary.

    For a busy family with changing plans, multiple subjects, outside activities, and real reporting needs, the flexibility is where it earns its place.

    Homeschool Planet Price and Free Trial

    At the time of this review, Homeschool Planet offers a 30-day free trial with no credit card required. The listed price is $9.95 per month or $84.95 per year.

    Pricing and features can change, so check the current offer before signing up.

    Start the free Homeschool Planet trial

    Is Homeschool Planet Worth It?

    For our family, yes.

    We have used it for six years because it gives us structure without making our homeschool rigid. I can plan both kids, manage outside activities and vacations, receive daily digests, keep strong records, and adjust the schedule when life changes.

    The rescheduling feature is what makes it stand out. It does not just show me that we missed something. It helps me decide what should happen next and then adjusts the rest of the plan.

    We did not just try Homeschool Planet. We kept it because it continues to work for the way our family actually lives and learns.

    Pricing and features were checked in July 2026 and may change.

  • Flashforge Adventurer 5M Review: A Great First “Real” 3D Printer for Families

    As an Amazon Associate I earn from qualifying purchases. This page may also contain other affiliate links, which means I may earn a commission at no additional cost to you.

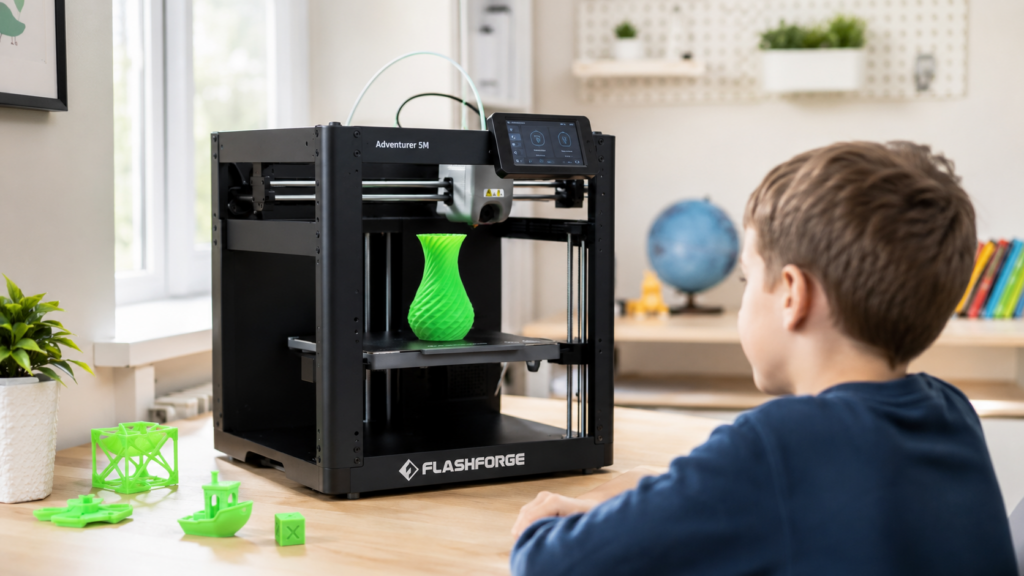
    Our children first learned 3D printing with a Toybox printer. It was a good introduction, but before long they wanted to create larger projects, use more detailed models, and have greater control over how their prints turned out.

    We considered Creality and Ender printers before choosing the Flashforge Adventurer 5M. We wanted something more capable than a toy printer without buying a machine that would require extensive calibration or advanced technical knowledge just to get started.

    The Adventurer 5M has been an excellent next step for our family.

    Check the current price of the Flashforge Adventurer 5M on Amazon

    Why We Chose the Flashforge Adventurer 5M

    The features that mattered most to us were:

    • Automatic bed leveling
    • Straightforward software
    • A larger build area than our beginner printer
    • Better control over print quality
    • Enough capability for the kids to grow into more advanced projects

    We wanted a printer that would challenge the kids without frustrating them. The Adventurer 5M has been a good balance between simplicity and flexibility.

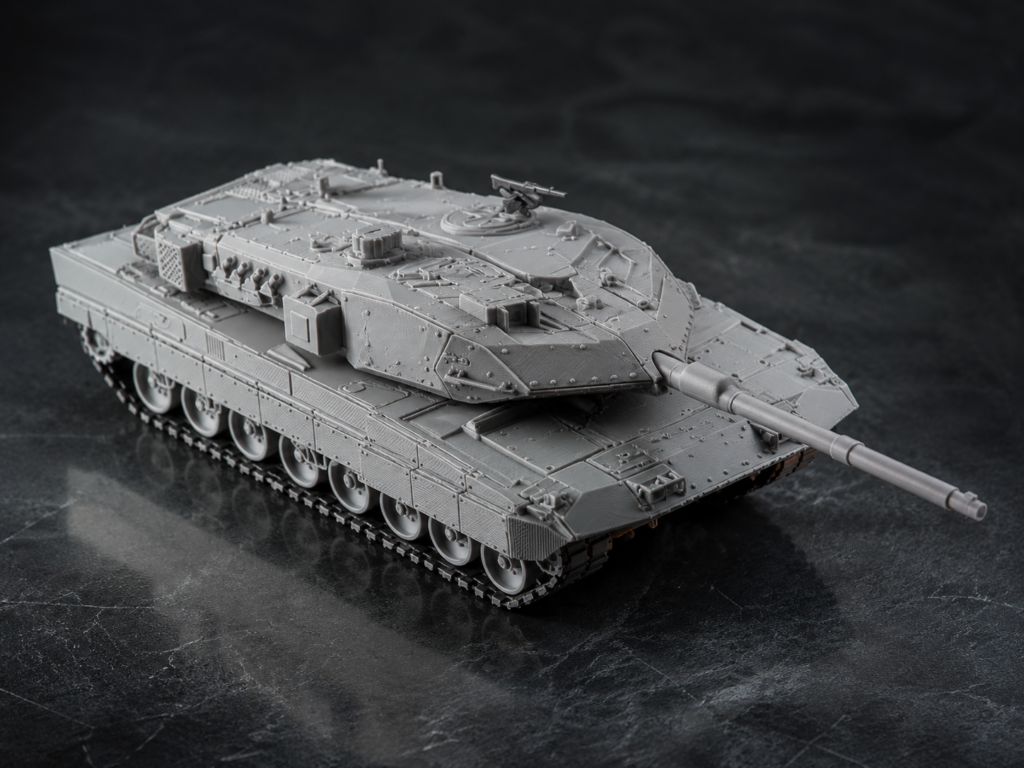
    Detailed gray 3D printed tank model. A detailed model showing the larger, more complex projects the printer can handle.

    Setup Was Surprisingly Simple

    The printer worked essentially out of the box.

    We installed the Flashforge software, downloaded a model, and had our first print running within about 30 minutes of opening the box.

    There was no lengthy manual leveling process or complicated initial calibration. That mattered because this was supposed to be an upgrade the children could actually enjoy, not another machine that required an adult to operate every time.

    Can Children Use It Independently?

    Our children, ages 9 and 12, are able to choose models, load them into the Flashforge software, prepare them, and start prints independently.

    For models that require support structures, they select the Auto Supports option in the software. That feature has worked reliably for the projects they have printed.

    The important part is remembering to click it. The software can generate supports automatically, but it does not help if someone forgets to select the option before starting the print.

    What Our Kids Have Printed

    This has become much more than a machine for printing simple test models.

    Our kids have made:

    • Fidgets
    • Busts of famous historical figures
    • Wearable sunglasses
    • Toy soldiers that they later painted
    • Larger decorative and creative projects

    It has given them opportunities to explore design, history, art, engineering, and problem solving without making the activity feel like another formal school assignment.

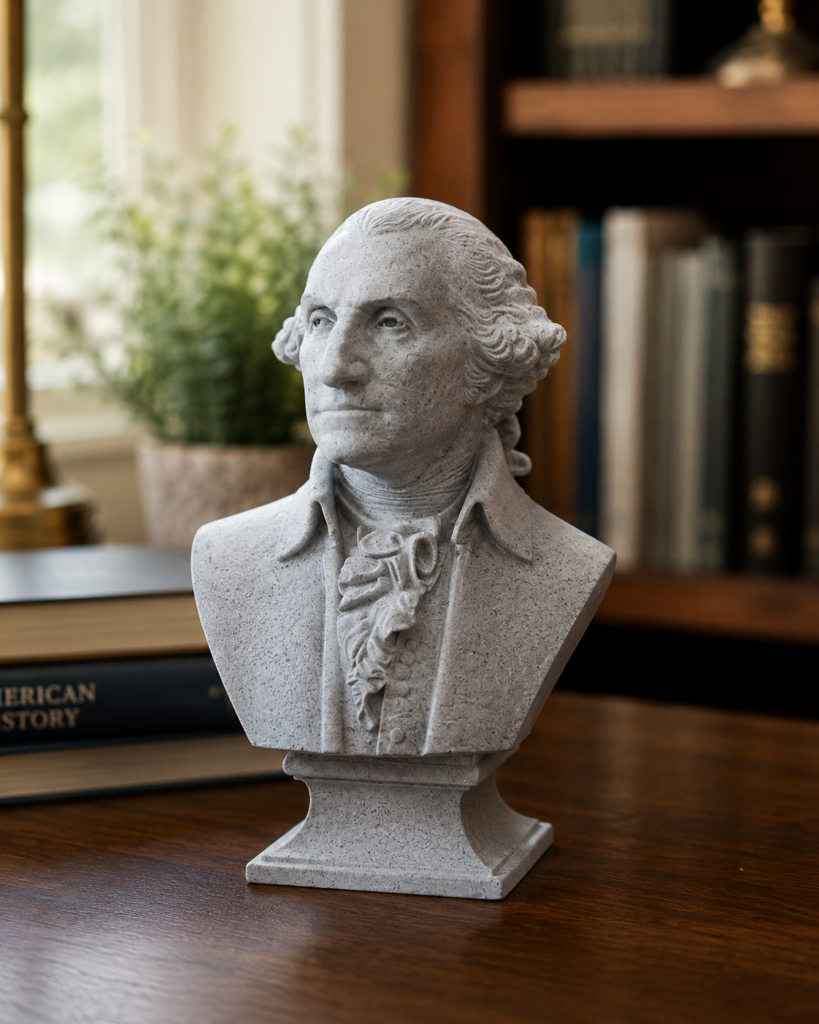
    Historical figures turn 3D printing into a hands on homeschool project.

    Print Quality Compared With a Toybox Printer

    The print quality is noticeably better than what we experienced with the Toybox.

    Models can have finer details, and the layer height can be adjusted to reduce how visible the individual print lines appear. This gives the children more control over whether they prioritize a smoother finish, faster printing, or greater detail.

    The software also provides more choices for model orientation and supports. Those options introduce a learning curve, but they are also what allow the children to move beyond beginner level prints.

    Support Settings That Helped Us

    Print orientation and support settings made a significant difference on models with overhangs.

    When printing at a 0.20 mm layer height, we found that setting the Top Z distance to 0.21 mm and increasing the Top interface layers to 3 helped make supports easier to remove while keeping the supported underside reasonably clean.

    The Top Z distance is the primary setting that affects how easily the supports release. The interface layers mainly influence the finish and contact quality beneath the supported area.

    These adjustments are only relevant for models that actually need supports.

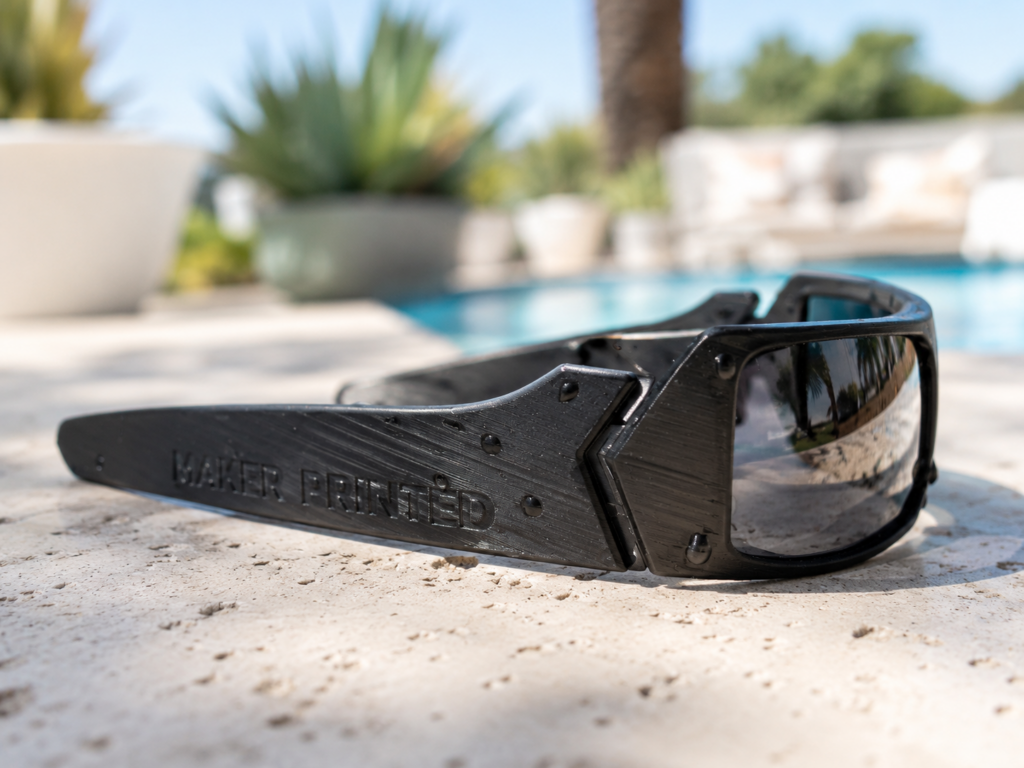
    One of the wearable projects printed by the kids.

    Reliability and Failed Prints

    The printer itself has been very dependable for us.

    Our failed prints have generally happened when filament became tangled because someone did not roll it back onto the spool correctly. As long as we inspect the spool before starting and make sure the filament can unwind freely, the printer performs reliably.

    We have not experienced recurring nozzle clogs, unexplained adhesion problems, or frequent mechanical failures.

    Filament Storage Matters

    We store our filament in sealed bags with desiccant packets inside lateral filing cabinets.

    For normal family and homeschool use, that has been sufficient. We are not operating a professional print shop, so we are practical rather than obsessive about filament preservation.

    A business that depends on highly consistent finishes may want a more controlled storage system or filament dryer. For the projects our family makes, sealed storage with desiccant has worked well.

    Filament is also easy to find in nearly any color the kids want.

    What Comes With the Printer?

    The Adventurer 5M includes the basic tools needed to begin using and maintaining it. It also came with adhesive that can be applied to the build plate when extra adhesion is helpful.

    We have not needed to purchase replacement parts or special equipment.

    Different nozzle sizes are available for anyone who wants to experiment with finer detail or faster material output, but the original nozzle has handled our family projects without a problem.

    The Main Drawbacks

    We have had only a few frustrations.

    Laptop connection issue

    At one point, my son’s laptop stopped connecting properly. Updating the Flashforge software restored the connection. It appears to have been a software issue rather than a printer failure.

    No built in camera

    I wish the printer included a camera from the beginning. A compatible camera can be purchased separately, but families who want to monitor longer prints remotely should include that additional cost in their decision.

    The software is fairly basic

    The Flashforge software is not as feature rich as some more advanced 3D printing ecosystems. For our family, that has actually made it easier to learn.

    Someone already operating more advanced printers may find the software limiting. A beginner family may appreciate that it does not overwhelm them with options.

    Who Is This Printer Best For?

    I would recommend the Flashforge Adventurer 5M to:

    • Families moving beyond a toy or beginner printer
    • Homeschool families interested in STEM, history, art, and design
    • Beginners who want automatic bed leveling
    • Parents who want older children to learn independent operation
    • People who want good print quality without complicated initial setup

    Someone running a professional production business or wanting the most advanced software platform may prefer a more advanced system.

    Would We Buy It Again?

    Absolutely.

    The Flashforge Adventurer 5M gave our family exactly what we wanted. It was a meaningful upgrade from the Toybox without making 3D printing overly technical or intimidating.

    Setup was simple, the print quality is much better, the kids can use it independently, and it has enough capability for them to continue learning.

    For an entry level family that wants its first capable 3D printer, it has been worth the price.

    See the Flashforge Adventurer 5M on Amazon